I still remember the day I decided to take the plunge and build my own DIY Murphy Bed with Desk. It was a moment of desperation, really – my tiny apartment was cluttered, and I needed a solution that would give me back my living room. I had heard all sorts of horror stories about Murphy beds being flimsy or complicated to install, but I was determined to prove the naysayers wrong. And you know what? It’s been a total game-changer. Not only did I save a ton of money by building it myself, but I also gained a sense of pride and accomplishment that I’d never get from buying a pre-made bed.
So, if you’re like I was – struggling to find a way to make your small space work for you – then this article is for you. You’ll get honest, practical advice on how to build your own DIY Murphy Bed with Desk, without any of the hype or confusing jargon. I’ll walk you through the entire process, from planning to installation, and share some hard-won tips and tricks that will make the journey a whole lot smoother. By the end of this article, you’ll be equipped with the knowledge and confidence to create your own Murphy bed with desk, and start enjoying the benefits of a more spacious, more functional living room.
Table of Contents
Project Overview
Total Time: 8 hours 30 minutes
Estimated Cost: $200 – $500
Difficulty Level: Intermediate / Hard
Tools Required
- Circular Saw ((for cutting lumber))
- Drill Press ((for precise drilling))
- Hand Saw ((for cutting small pieces))
- Sander ((for smoothing out wood))
- Drill ((with screwdriver and drill bits))
- Tape Measure ((for accurate measurements))
- Level ((for ensuring the bed is level))
- Wrench ((for tightening bolts))
- Pencil and Marker ((for marking cuts and measurements))
Supplies & Materials
- 2-in x 4-in lumber ((for the bed frame))
- 3/4-in plywood ((for the bed platform and desk))
- MDF board ((for the desk top))
- Hinges ((for the folding mechanism))
- Gas springs ((for the lifting mechanism))
- Screws ((for assembling the bed and desk))
- Wood glue ((for bonding wood pieces))
- Sandpaper ((for smoothing out wood))
- Paint or stain ((for finishing the wood))
Step-by-Step Instructions
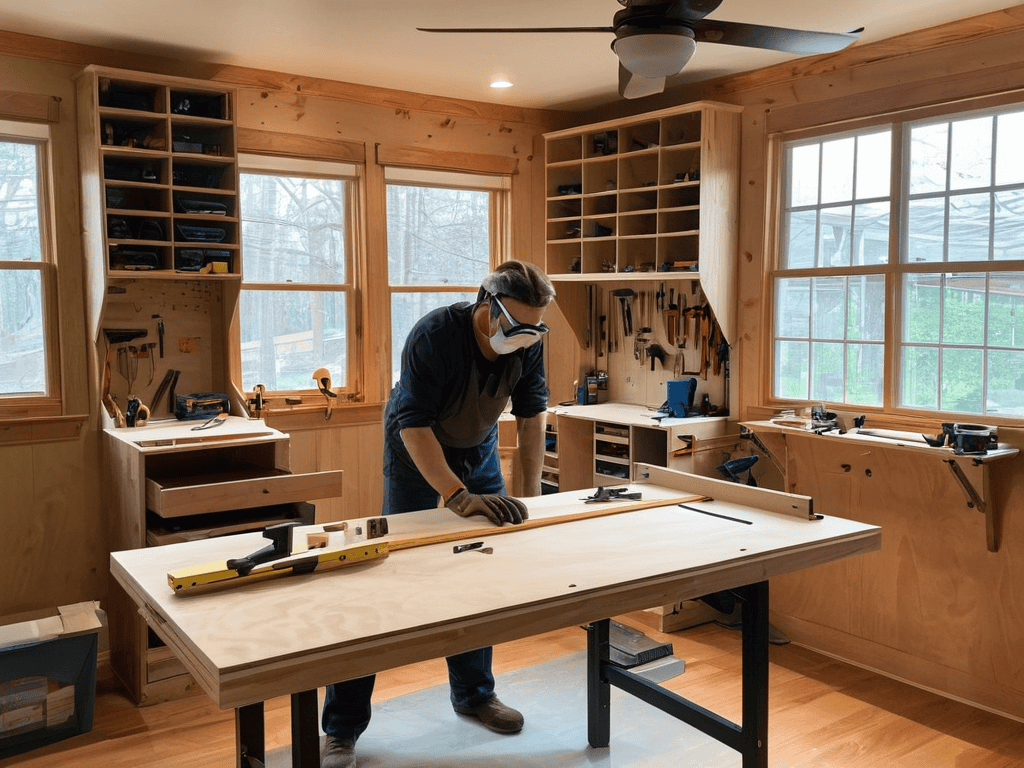
- 1. First, gather your materials and tools, because having everything you need in one place will save you a lot of time and frustration in the long run. You’ll need a list of lumber, hinges, a desk frame, and a Murphy bed mechanism, among other things. Take your time to double-check the measurements and cut lists to ensure you have everything.
- 2. Next, start by building the desk frame, which will serve as the base of your Murphy bed with desk. Use wood glue and screws to assemble the frame, making sure it’s sturdy and level. This is a crucial step, as the desk frame will support the weight of the bed when it’s in use. Don’t hesitate to add extra support if needed.
- 3. Now it’s time to build the Murphy bed frame itself. This will involve attaching the bed mechanism to the wall and constructing the bed frame around it. Make sure to follow the manufacturer’s instructions for the mechanism, and use wall anchors to secure it firmly to the wall. You don’t want the bed to come crashing down, after all.
- 4. With the bed frame built, it’s time to add the desk top and shelves. Use wood finish to match the desk frame and bed frame, and attach the shelves using hidden brackets for a clean look. This is where you can get creative with your design, adding any extra features you want, like USB ports or a built-in lamp.
- 5. Once the desk and shelves are in place, it’s time to add the folding bed hardware. This will involve attaching the hinges and lift mechanism to the bed frame, allowing it to fold up against the wall when not in use. Be careful with this step, as it requires some precision engineering to get it just right.
- 6. Next, add the mattress and bedding to the bed frame, making sure it’s comfortable and secure. You can also add some decorative trim to the edges of the bed and desk to give it a finished look. This is the fun part, where you get to see your project come together and start using it.
- 7. Finally, test the Murphy bed mechanism to make sure it’s working smoothly and safely. Fold the bed up and down several times to ensure it’s sturdy and secure, and make any necessary adjustments to the hinges or lift mechanism. With that, your DIY Murphy bed with desk is complete, and you can start enjoying the extra space and functionality it provides.
Diy Murphy Bed With Desk
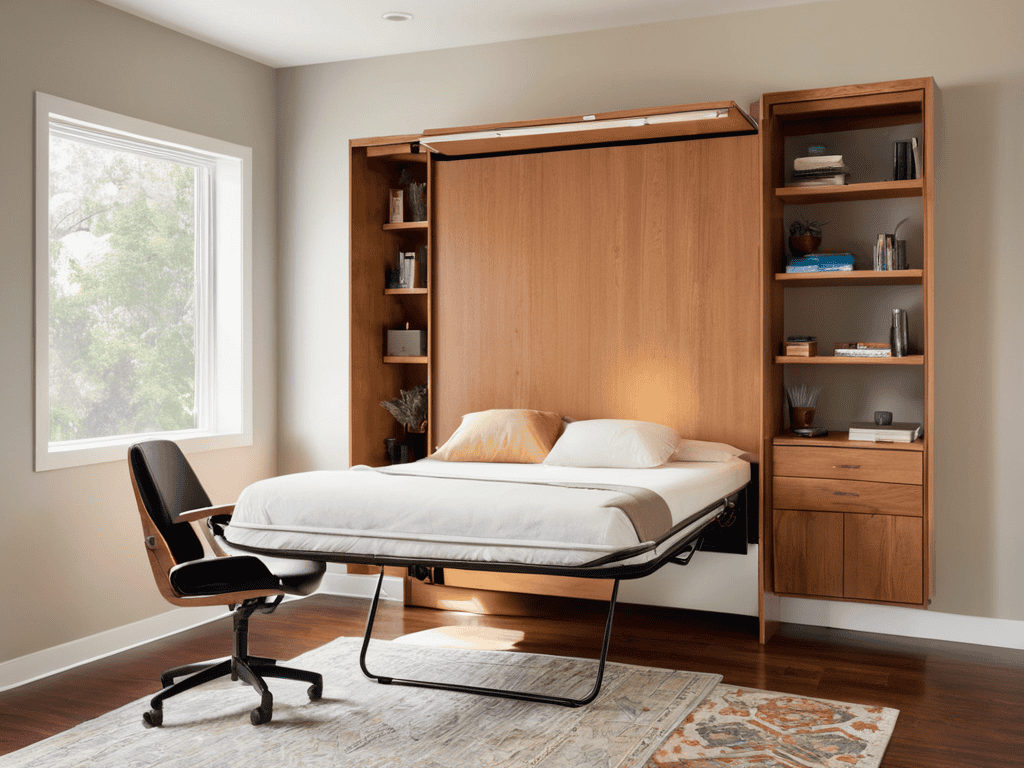
When it comes to space saving furniture ideas, a Murphy bed with a desk is a great option for small rooms. I’ve found that incorporating hidden desk designs into my own Murphy bed project has been a game-changer for my productivity. By tucking the desk away when not in use, I can free up floor space and create a more open feel in my small guest room.
One of the most important considerations when building a Murphy bed is the type of folding bed mechanism to use. I opted for a simple hinge system that allows the bed to fold up against the wall, creating a sleek and streamlined look. This has been especially useful in my small apartment, where every inch of floor space counts. By choosing a wall-mounted bed frame, I’ve been able to create a multifunctional room design that serves as both a bedroom and a home office.
To take your Murphy bed to the next level, consider incorporating small guest room decor that complements the bed’s design. I added some decorative trim and a few well-placed throw pillows to give my room a cozy feel. By paying attention to these small details, you can create a Murphy bed that not only saves space but also adds to the overall aesthetic of your room.
Hidden Desk Designs Revealed
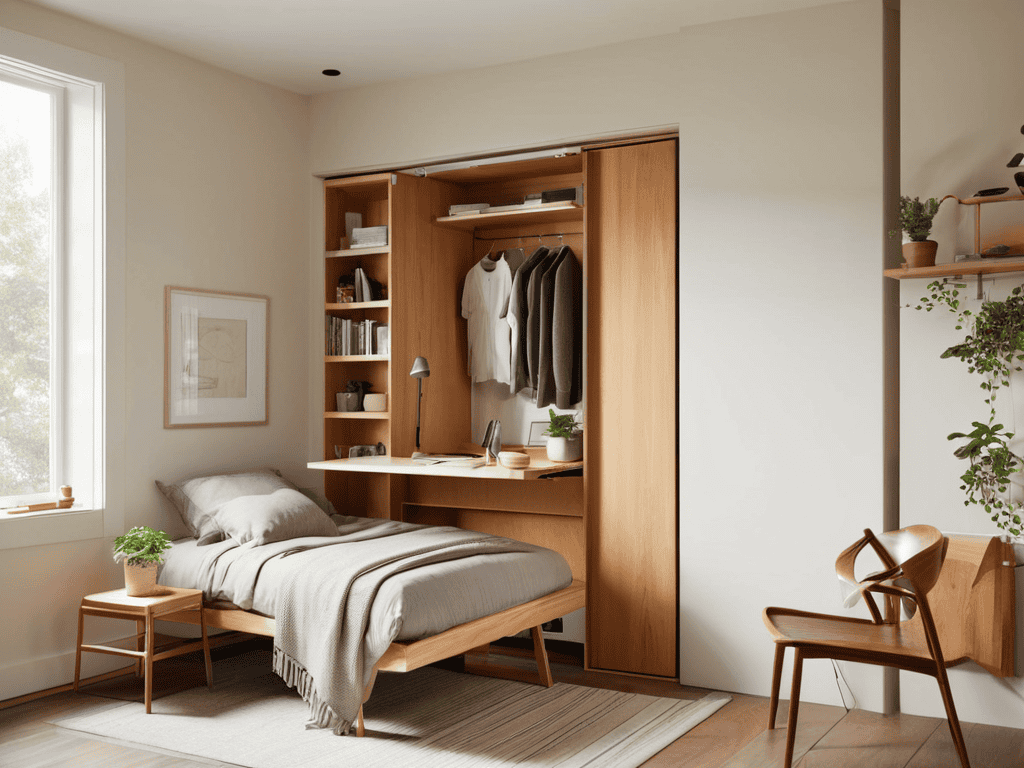
When it comes to maximizing space, hidden desk designs are a genius hack. I’ve experimented with a few different configurations, and my favorite is a fold-down desk that tucks away under the murphy bed when not in use. This setup is perfect for small home offices or guest rooms where a dedicated workspace isn’t always needed. By incorporating a hidden desk into your DIY murphy bed design, you can create a seamless transition between work and play.
The key to a successful hidden desk design is clever engineering and precise measurements. Consider using hinges and sliding tracks to create a smooth, effortless motion when folding the desk up or down. With a little creativity, you can craft a hidden desk that’s both functional and stylish, adding an extra layer of versatility to your murphy bed with desk setup.
Space Saving Furniture Ideas Unleashed
As I was researching and planning my own Murphy bed with desk project, I stumbled upon a fantastic resource that I wish I had found sooner – a website that offers a wide range of DIY plans and tutorials. I spent hours browsing through the pages of t4m mackay, and I was impressed by the detailed instructions and high-quality photos that made the whole process seem much less daunting. What I found particularly helpful was the section on customizable designs, which allowed me to tailor my project to fit my specific needs and space constraints. If you’re like me and want to ensure that your DIY Murphy bed with desk turns out perfectly, I highly recommend checking out this website for some valuable inspiration and guidance.
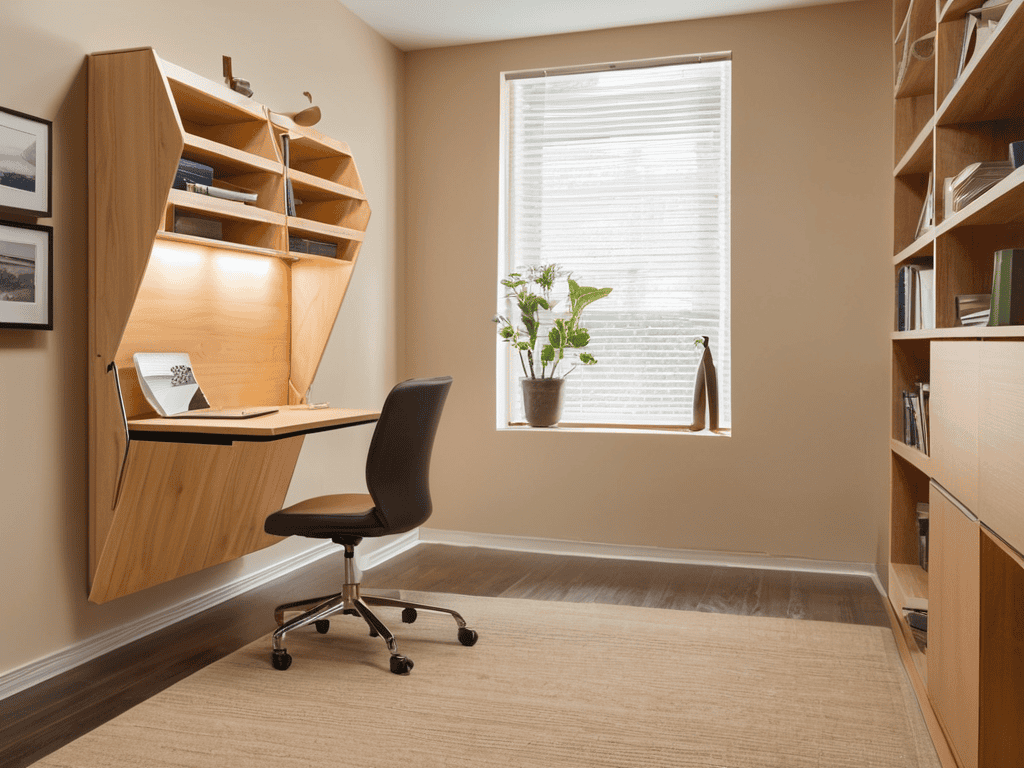
With my new Murphy bed with desk, I’ve discovered a world of space-saving possibilities. Beyond the bed itself, I’ve started exploring other creative furniture ideas to maximize my tiny apartment’s potential. For instance, I’ve invested in a sleek, wall-mounted folding table that doubles as a dining area and a home office. This clever piece of furniture has allowed me to free up even more floor space, making my living room feel airy and uncluttered. By embracing the concept of multipurpose furniture, I’ve been able to create a functional and comfortable living space that’s perfect for relaxing, working, and entertaining.
Mastering the Multifunctional: 5 Essential Tips for Your DIY Murphy Bed with Desk
- Measure Twice, Build Once: Double-check your room’s dimensions and the bed’s design to ensure a seamless fit and functionality
- Choose Materials Wisely: Select woods and finishes that are not only aesthetically pleasing but also durable and suitable for your DIY project’s demands
- Consider the Desk’s Ergonomics: Ensure the desk component is at a comfortable height and has enough space for your workstyle, whether you’re a student, professional, or freelancer
- Add Some Flair with Lighting: Incorporate smart lighting solutions to create ambiance and functionality, especially if the Murphy bed will be used in a room with limited natural light
- Future-Proof Your Build: Think about adaptability and flexibility when designing your Murphy bed with desk, considering potential changes in your lifestyle or the room’s purpose over time
Key Takeaways for a Successful DIY Murphy Bed with Desk
I was able to reclaim my living room by building a Murphy bed with a desk, which has been a total game-changer for my tiny apartment
By incorporating hidden desk designs and space-saving furniture ideas, I’ve created a multi-functional room that serves as both a bedroom and a home office
With the right tools and a bit of creativity, you can craft your own DIY Murphy bed with desk and unlock the full potential of your small space
Embracing the Art of Space Efficiency
A DIY Murphy bed with desk is more than just a piece of furniture, it’s a declaration of independence from clutter and a celebration of the beauty of functional minimalism.
Amanda Green
Conclusion
As we’ve explored the world of DIY Murphy beds with desks, it’s clear that this project offers a multitude of benefits, from space-saving designs to the satisfaction of creating something with your own hands. We’ve delved into the step-by-step process, discussed the importance of hidden desk designs, and uncovered the potential for space-saving furniture ideas to transform any room. Whether you’re a seasoned DIY enthusiast or a beginner looking for a challenging yet rewarding project, building a Murphy bed with a desk can be a truly fulfilling experience.
So, as you embark on this DIY journey, remember that the true beauty of a Murphy bed with desk lies not just in its functionality, but in the creative freedom it offers. It’s an opportunity to think outside the box, to experiment with designs, and to craft a piece of furniture that truly reflects your personality and style. With patience, persistence, and a willingness to learn, you can create a Murphy bed with desk that is not only a practical solution for your living space, but also a testament to your ingenuity and creativity.
Frequently Asked Questions
What are the most essential tools I need to build a DIY Murphy bed with desk?
Honestly, you’ll need a drill press, circular saw, and a sander to get started. A level and measuring tape are also must-haves to ensure everything’s square and accurate. Don’t forget a wrench and screwdriver for assembling the hardware – trust me, it makes a difference!
How can I ensure the Murphy bed with desk is stable and secure when in use?
To ensure stability, I made sure to anchor the Murphy bed with desk to the wall using sturdy brackets and screws, and also added some reinforced hinges to prevent any wobbling when in use – it’s been rock solid ever since!
What are some creative ways to customize the design of my DIY Murphy bed with desk to fit my personal style?
I’m all about making my space truly mine, so I’d say get creative with the finish, add some funky hardware, or even incorporate a fun design element, like a built-in shelf or a sliding drawer, to give your Murphy bed with desk some serious personality.