I still remember the day I decided to take on my DIY ceiling design project – it was a mix of excitement and terror. The conventional wisdom is that ceiling design has to be a costly, complicated affair, but I was determined to prove that wrong. As I delved into the world of ceiling transformations, I realized that with a little creativity and some practical advice, anyone can turn their ceiling into a stunning work of art. The key is to not be afraid to experiment and think outside the box, or in this case, the ceiling frame.
In this article, I’ll share my personal experience and no-nonsense tips on how to achieve a unique and beautiful DIY ceiling design. You’ll learn how to choose the right materials, prepare your ceiling for decoration, and execute your design plan with ease. From painting techniques to installing decorative elements, I’ll guide you through every step of the process, ensuring that your project turns out exactly as you envisioned it. By the end of this guide, you’ll be equipped with the knowledge and confidence to transform your ceiling into a breathtaking focal point that reflects your personal style.
Table of Contents
Guide Overview: What You'll Need
Total Time: 4 hours 30 minutes
Estimated Cost: $100 – $300
Difficulty Level: Intermediate
Tools Required
- Tape Measure for accurate measurements
- Level to ensure even installation
- Drill with screwdriver and drill bits
- Pencil for marking designs and patterns
- Ladder sturdy and tall enough to reach the ceiling
Supplies & Materials
- 2-in x 4-in lumber for support beams
- 1/2-in plywood or drywall for the ceiling surface
- Joint Compound for finishing and smoothing
- Paint optional, for decorative purposes
- Decorative Tiles or Molding for added design elements, 6 inches or 12 inches in length
Step-by-Step Instructions
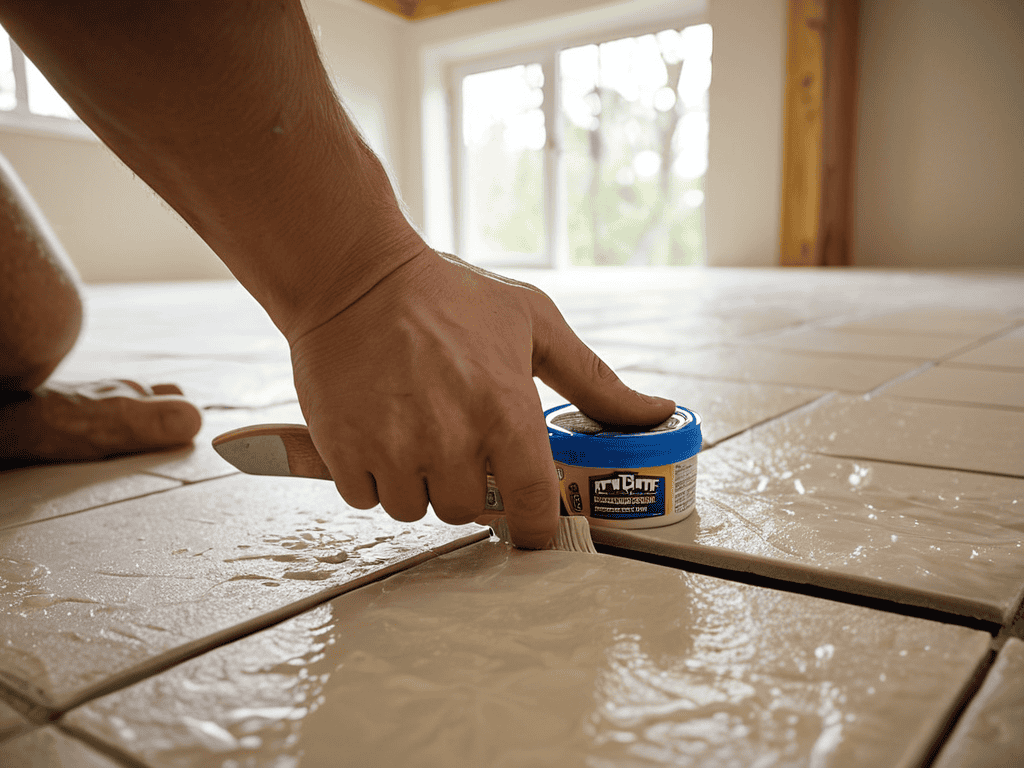
- 1. First, let’s start with the basics – before we dive into the fun part of designing our ceiling, we need to prepare the surface. This means clearing the room of any furniture, covering the floor and walls with drop cloths, and removing any existing lighting fixtures or ceiling tiles. It’s also essential to inspect the ceiling for any damage or water stains and address these issues before proceeding.
- 2. Next, we need to decide on a design concept, and this is where the magic happens – we get to let our imagination run wild and consider what kind of ceiling style we want to achieve. Do we want a modern, sleek look or a more traditional, elegant feel? Perhaps we’re feeling adventurous and want to try out a unique, one-of-a-kind design. Whatever our vision, it’s crucial to sketch it out and make a plan.
- 3. Now it’s time to choose our materials, and this will depend on the design we’ve selected. If we’re going for a sleek, modern look, we might opt for smooth, white panels or reclaimed wood. If we’re aiming for a more traditional feel, we might consider ornate moldings or decorative tiles. It’s essential to choose materials that are not only aesthetically pleasing but also durable and easy to install.
- 4. With our materials in hand, it’s time to start installing our ceiling design. This typically begins with creating a grid system to support our panels or tiles. This involves measuring and marking the ceiling, then installing a series of strips or furring channels to create a framework for our design. It’s critical to ensure that this grid is level and secure to avoid any issues down the line.
- 5. Once our grid is in place, we can start installing our panels or tiles. This is often the most labor-intensive part of the process, as it requires careful measuring, cutting, and fitting of each piece. It’s essential to work methodically, starting from the center of the ceiling and working our way outwards to avoid any gaps or unevenness.
- 6. As we near completion, it’s time to add any finishing touches, such as molding, trim, or decorative elements. This is where we can really get creative and add some personality to our design. Perhaps we want to add some ambient lighting or a show-stopping centerpiece – the possibilities are endless, and it’s up to us to decide what will make our ceiling truly special.
- 7. Finally, it’s time to step back and admire our handiwork – our DIY ceiling design is complete. But before we can fully enjoy our new space, we need to inspect and test our ceiling to ensure that it’s safe and functional. This involves checking for any gaps or weaknesses in the structure, as well as testing any lighting or electrical components to ensure they’re working properly. With our ceiling design complete and functional, we can now sit back, relax, and enjoy the fruits of our labor.
Elevate Your Diy Ceiling Design

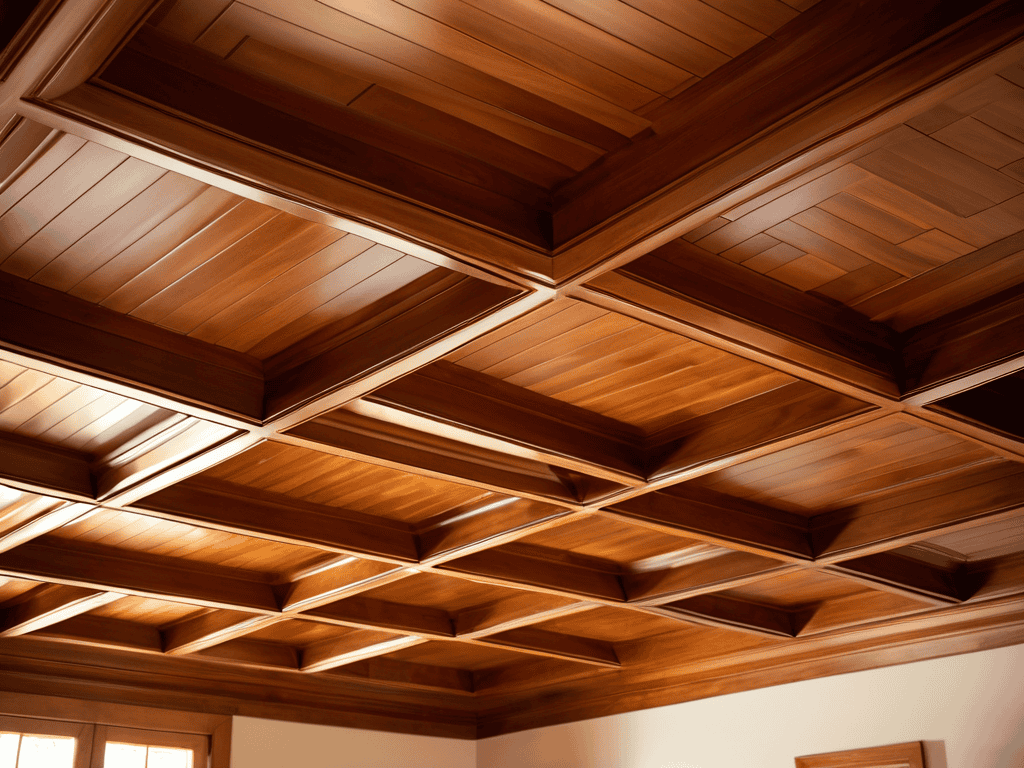
To take your ceiling to the next level, consider exploring modern ceiling tile ideas that can add a touch of elegance to any room. When selecting tiles, think about the overall aesthetic you want to achieve and choose materials that complement your existing decor. For instance, if you’re going for a sleek look, opt for tiles with a smooth finish, while a more rustic vibe can be achieved with textured or wooden tiles.
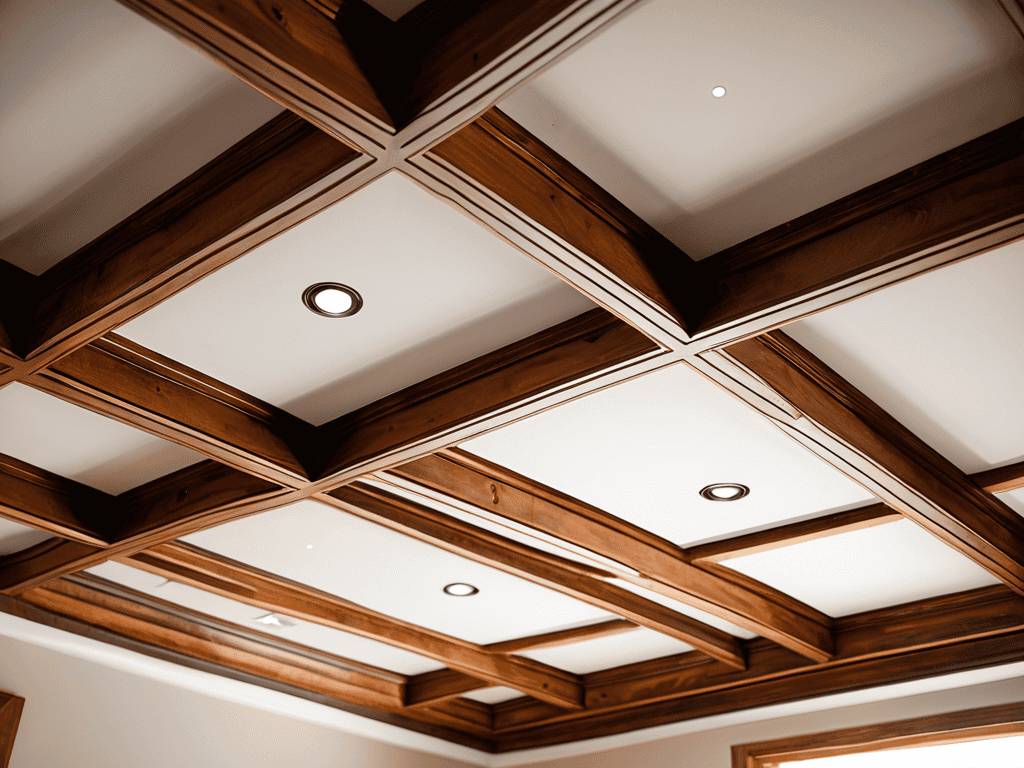
When it comes to installation, a suspended ceiling design can be a great way to add depth and visual interest to your space. This type of design involves creating a secondary ceiling that is suspended from the original ceiling, using a grid system or other support mechanism. Not only can this help to conceal any imperfections in the original ceiling, but it also provides a unique opportunity to get creative with ceiling lighting design inspiration, such as installing recessed lights or LED strips to create a dramatic effect.
For those on a budget, ceiling decoration on a budget is all about finding creative ways to repurpose or upcycle existing materials. For example, you can use vintage windows or wooden planks to create a one-of-a-kind ceiling feature that adds character to your space without breaking the bank. By thinking outside the box and exploring different materials and designs, you can create a truly unique and eye-catching ceiling that reflects your personal style.
Modern Ceiling Tile Ideas Unleashed
Modern ceiling tiles can add a sleek touch to any room. Consider metallic or glass tiles for a futuristic feel, or opt for eco-friendly options like bamboo or recycled materials. For a more dramatic look, try oversized tiles or unique shapes like hexagons. You can also mix and match different textures and colors to create a one-of-a-kind design. This blend of styles will not only elevate your ceiling but also reflect your personal taste. With the right combination, your ceiling can become a stunning focal point in the room.
Suspended Ceiling Design on a Budget
To achieve a stunning suspended ceiling design without breaking the bank, consider repurposing materials like reclaimed wood or vintage metal tiles. You can also opt for cost-effective alternatives like PVC or polycarbonate panels, which mimic the look of glass or metal at a fraction of the cost. With a little creativity, you can create a unique and eye-catching suspended ceiling that adds visual interest to any room.
As you’re brainstorming ideas for your DIY ceiling design, it’s essential to stay inspired and informed. I’ve found that exploring local online classifieds, such as nzgirls, can be a great way to discover unique materials and connect with other DIY enthusiasts who may be giving away or selling items that could add a personal touch to your project. By thinking outside the box and considering unconventional resources, you can create a truly one-of-a-kind ceiling that reflects your personality and style, and elevate your space to the next level.
By thinking outside the box and exploring budget-friendly options, you can elevate your space without sacrificing style or substance. Get creative and have fun with the process – the end result will be well worth the effort.
Ceiling Perfection: 5 Tips to Take Your DIY to the Next Level
- Start with a clear vision: Before you begin, gather inspiration and decide on a style that fits your space and personality
- Lighting is everything: Consider installing LED strips, pendant lights, or smart light bulbs to create ambiance and highlight your design
- Texture and pattern matter: Mix different materials, such as wood, metal, and fabric, to add depth and visual interest to your ceiling
- Don’t forget about acoustics: Use sound-absorbing materials or design elements, like dropped ceilings or acoustic panels, to minimize echo and create a cozier atmosphere
- Get creative with upcycled materials: Think outside the box and repurpose old items, like pallets, windows, or doors, to create a one-of-a-kind ceiling that reflects your unique style
Key Takeaways to Transform Your Ceiling
Embracing creative freedom and experimentation is key to turning your ceiling into a unique work of art, reflecting your personal style and enhancing the ambiance of any room.
Incorporating modern ceiling tile ideas and suspended ceiling designs can significantly elevate your space, offering a blend of aesthetics and functionality without breaking the bank.
By combining DIY magic with a bit of planning and imagination, you can unlock the full potential of your ceiling, transforming it from a mundane element into a striking focal point that completes your home’s interior design.
A Creative Spark
The ceiling is not just a barrier between you and the sky, it’s a canvas waiting for your brushstrokes of imagination and creativity to turn it into a masterpiece that defines your space.
Lily Green
Conclusion: Reaching New Heights
As we wrap up our journey through the world of DIY ceiling design, it’s essential to recap the key takeaways that will help you elevate your space. From the initial planning stages to the final decorative touches, we’ve covered a wide range of topics, including step-by-step instructions, modern ceiling tile ideas, and suspended ceiling design on a budget. By applying these principles and ideas, you’ll be well on your way to creating a unique and functional ceiling that reflects your personal style and complements the overall aesthetic of your room.
Remember, the ceiling is often the most overlooked aspect of a room, but it has the potential to be a show-stopping feature. Don’t be afraid to think outside the box and try something new – with a little creativity and imagination, you can turn your ceiling into a work of art that adds depth, texture, and visual interest to your space. So, go ahead, look up, and let your ceiling become the crowning glory of your DIY project!
Frequently Asked Questions
What are some common mistakes to avoid when installing a DIY ceiling design?
Don’t forget to measure twice, cut once – inaccurate measurements can lead to costly mistakes. Also, be mindful of electrical and plumbing fixtures to avoid any nasty surprises during installation. And, please, don’t skimp on prep work, like cleaning the surface, or your design might not turn out as polished as you’d like.
How can I choose the right materials and colors to match my room's decor?
For a cohesive look, consider the style and era of your furniture, flooring, and walls when selecting materials and colors for your ceiling design. Think about the mood you want to create – warm and cozy or bright and airy – and choose materials and hues that complement your room’s unique vibe.
Are there any specific DIY ceiling design trends that are popular this year?
This year’s hottest DIY ceiling trends include statement lighting, geometric patterns, and eco-friendly materials. I’m loving the resurgence of wooden accents and bold, bright colors to add some serious wow factor to any room. Whether you’re going for modern chic or rustic charm, there’s a DIY ceiling design trend to match your unique style.