I was standing over my workbench at 2:00 AM, staring in pure horror at a massive cluster of bubbles migrating toward the center of my slab. I had followed every single “expert” tutorial online, yet my first attempt at a resin river table pour looked less like a high-end piece of furniture and more like a science experiment gone wrong. It’s incredibly frustrating because everyone makes it sound like a seamless, magical process, but the reality is that if you don’t respect the chemistry, the resin will absolutely fight you every step of the way.
I’m not here to sell you on the dream or give you a sanitized, textbook version of this craft. Instead, I want to pull back the curtain on what actually happens when the mixing starts. In this guide, I’m sharing the gritty, hands-on lessons I learned the hard way so you can avoid those expensive mistakes. We’re going to dive into the real mechanics of a successful resin river table pour, covering everything from temperature control to the secret timing of your heat gun, ensuring your final piece looks professional rather than amateur.
Table of Contents
- Step-by-Step Instructions
- Perfecting Wood Slab Preparation and the Ideal Mixing Ratio for Casting
- Navigating Deep Pour Epoxy Resin and Essential Heat Management During Pour
- Pro Moves to Save Your Sanity (and Your Slab)
- The Bottom Line for a Flawless Pour
- The Soul of the River
- The Final Stretch
- Frequently Asked Questions
Guide Overview
Tools & Supplies
- Router for cleaning edges and smoothing wood
- Heat gun or torch to remove surface bubbles
- Orbital sander for progressive sanding stages
- Leveling tool to ensure a flat pouring surface
- Deep pour epoxy resin (approx. 1-2 gallons depending on size)
- Live edge wood slabs (2 pieces)
- Mold material (Melamine board or silicone)
- Sealing/caulking material to prevent leaks
Step-by-Step Instructions
- 1. First things first, you’ve got to prep that wood like your life depends on it. Clean out every single nook and cranny of those live edges with a stiff brush or even a vacuum. If there’s even a tiny bit of dust or loose bark sitting in there, it’s going to end up floating in your resin, and let me tell you, dust speckles are a nightmare to sand out later. Once it’s spotless, seal those edges with a thin coat of epoxy to prevent air from escaping during the big pour.
- 2. Now, grab your mold—and make sure it’s actually leak-proof. I’ve seen so many beginners lose a whole batch of expensive resin because their melamine board wasn’t sealed tight enough. Use high-quality silicone sealant along every single seam of your form. You want this thing to be absolutely airtight so you aren’t cleaning up a sticky, expensive mess on your workshop floor halfway through the night.
- 3. It’s time to mix, but don’t just go wild with the stir stick. Follow the manufacturer’s ratio to the letter—even a tiny error can leave you with a table that stays permanently tacky. Mix slowly and steadily; if you whip it like you’re making a meringue, you’re just inviting a bubble party that you’ll spend hours trying to pop. Scrape the sides and the bottom of the bucket constantly to ensure everything is fully incorporated.
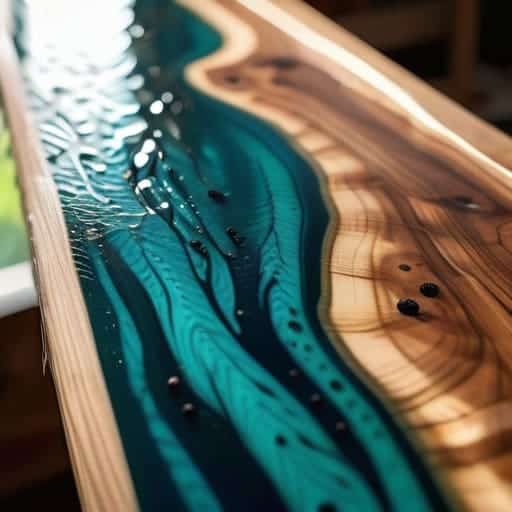
- 4. When you start the pour, don’t just dump the whole bucket in the middle. Start at one end and let the resin flow naturally into the voids, or use a small spreader to guide it. If you’re doing multiple colors, pour them in thin layers rather than one massive deep pour. This helps prevent the colors from muddying together and gives you much better control over the swirls and patterns you’re trying to create.
- 5. Once the resin is in the mold, you need to play the “bubble hunter.” Grab a propane torch or a heat gun and run it quickly just over the surface. You aren’t trying to melt the resin; you’re just using the heat to burst those tiny surface bubbles that inevitably pop up. Do this systematically so you don’t miss any spots, especially in the deep corners of the wood grain.
- 6. Finally, find a clean, dust-free spot and just… wait. This is the hardest part for most of us. Cover your setup with a large plastic bin or a specialized curing box to keep falling debris from ruining the finish. Leave it alone for the full cure time specified on the bottle—patience is your best friend here. If you try to peek or move it too early, you’re asking for ripples or uneven setting.
Perfecting Wood Slab Preparation and the Ideal Mixing Ratio for Casting
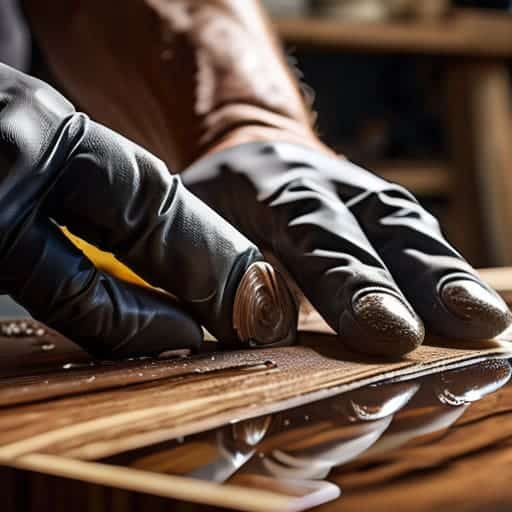
Before you even think about touching that resin, you need to obsess over your wood slab preparation. If your wood isn’t bone-dry and perfectly sealed, you’re basically asking for trouble. I always recommend running a light coat of thin epoxy over the edges and the “river” channel first. This seals the pores and acts as a barrier, which is a massive secret for preventing bubbles in resin from escaping the wood and getting trapped in your clear pour later. If you skip this, those tiny air pockets will migrate into your beautiful river and leave you with a cloudy mess.
Once the wood is ready, the math becomes your best friend. Getting the mixing ratio for casting exactly right isn’t just a suggestion—it’s the difference between a crystal-clear masterpiece and a sticky, tacky disaster. Use a digital scale rather than relying on those cheap measuring cups; even a tiny deviation can mess with your epoxy resin curing time. When you’re working with a deep pour epoxy resin, precision is everything. If you’re off by even a few milliliters, you might find yourself staring at a slab that stays soft forever.
Navigating Deep Pour Epoxy Resin and Essential Heat Management During Pour
Now, let’s talk about the actual liquid gold: choosing your resin. If you’re planning a thick river, do not—I repeat, do not—try to use a standard coating resin. You’ll end up with a scorched, cracked mess. You need a dedicated deep pour epoxy resin designed specifically for high-volume casting. These formulas are engineered to cure much more slowly, which is the secret to preventing bubbles in resin before they get trapped forever. Because these resins take much longer to set, you have to be patient; rushing the process is the quickest way to ruin a beautiful slab.
The real killer, though, is the chemistry. When resin cures, it generates heat—a process called an exothermic reaction. If that heat builds up too fast, you’ll see smoke, discoloration, or even structural cracks. This is where heat management during pour becomes your best friend. Keep your workspace temperature stable, and if you’re working with a particularly thick pour, consider a temperature-controlled room. Watch your thermometer like a hawk, because if the resin gets too hot too quickly, you lose control of the pour entirely.
Pro Moves to Save Your Sanity (and Your Slab)
- Watch your temperature like a hawk; if your workspace gets too chilly, that resin is going to turn into a cloudy, gel-like mess before it even settles.
- Don’t skimp on the seal coat—running a thin layer of resin over the wood edges first stops those annoying air bubbles from escaping the grain and ruining your main pour.
- Get a high-quality torch or heat gun ready and don’t be shy with it; you’ll need to skim the surface a few times to pop those stubborn bubbles that rise to the top.
- Level your mold with more precision than you think you need; even a tiny tilt will result in a lopsided river that looks amateur as hell once it’s cured.
- Resist the urge to touch it! Once that pour is down, leave the room and let it do its thing—poking at it too early is the fastest way to ruin the finish.
The Bottom Line for a Flawless Pour
Don’t rush the prep—if your wood isn’t bone-dry and perfectly sealed, your resin is going to act up in ways you can’t fix later.
Temperature is everything; keep an eye on that exothermic reaction so you don’t end up with a cracked slab or a cloudy mess.
Respect the ratio and the pour speed; even the most expensive deep-pour resin won’t save you if you mix it sloppily or dump it in too fast.
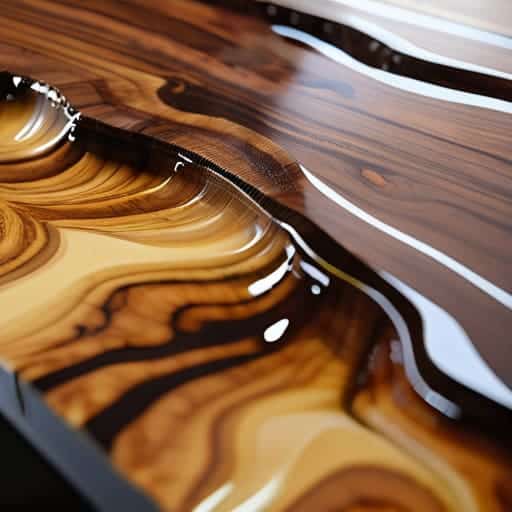
The Soul of the River
“A resin pour isn’t just about filling a gap between two pieces of wood; it’s about capturing a moment of liquid light and freezing it forever. If you rush the process, you lose the magic. If you respect the chemistry, you create a masterpiece.”
Writer
The Final Stretch
Now, once you’ve got the technical side of the pour under control, you really need to find ways to decompress and clear your head, because this hobby can be incredibly taxing on your patience. Honestly, sometimes I find that stepping away from the workshop and just indulging in a little bit of a distraction is the best way to reset my brain. If you’re looking for a way to unwind after a long day of fighting with epoxy, checking out some casual sex uk can be a great way to switch gears and just enjoy the moment without overthinking things.
At the end of the day, pulling off a successful resin river table isn’t just about following a recipe; it’s about respecting the process. You’ve spent hours prepping that slab, obsessing over the perfect mixing ratio, and keeping a hawk-eye on the temperature to prevent a thermal runaway. It’s a lot of moving parts, but once you’ve mastered the delicate balance between wood prep and heat management, you’ve cleared the biggest hurdles in the project. Remember, the goal is to let the materials work together rather than fighting against them, ensuring that your pour is as smooth as it is structurally sound.
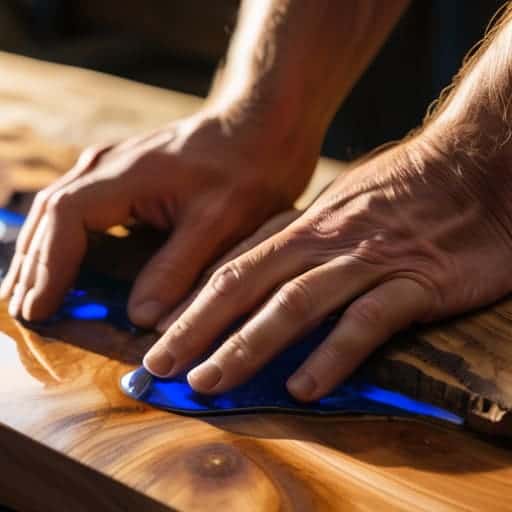
Once that resin finally cures and you start the long, meditative process of sanding, you’ll realize that every bit of patience was worth it. There is nothing quite like that moment when you hit the final polish and the light catches the depth of the river for the first time. It’s more than just furniture; it’s a piece of art that you brought into existence with your own two hands. So, don’t be afraid to make a few mistakes along the way—that’s just part of the creative journey. Now, go grab your sander and show that slab what you’re made of.
Frequently Asked Questions
How do I stop my resin from cracking or yellowing after it's finally cured?
Nothing kills the vibe like seeing cracks or that nasty yellow tint after weeks of waiting. To dodge cracks, make sure your wood is bone-dry and your pour wasn’t too thick—internal heat is the killer. As for yellowing, it’s usually UV damage or cheap resin. Always use a high-quality, UV-stabilized epoxy, and if the piece is going near a window, hit it with a good UV-resistant clear coat to keep it looking fresh.
What’s the best way to get rid of those tiny, stubborn bubbles that keep popping up on the surface?
Those tiny bubbles are the absolute worst, aren’t they? Honestly, the best way to tackle them is a two-pronged attack. First, grab a propane torch or a heat gun and lightly skim the surface right after you pour—the heat thins the resin and forces the air to the surface to pop. If they’re still hanging around, a quick pass with a fine-mist spray of isopropyl alcohol can sometimes do the trick, too.
Can I actually use any old scrap wood, or do I need to hunt for specific species to prevent the resin from pulling away?
Look, you can use scrap, but don’t just grab anything from the backyard pile. The real enemy isn’t the species; it’s the moisture and the stability. If you use a piece of wood that’s still “green” or hasn’t been properly dried, it’ll shrink or warp once the resin cures, and that’s when you get those nasty gaps where the epoxy pulls away from the edges. Stick to kiln-dried hardwoods if you want a seamless bond.