I remember standing in the middle of a rain-slicked alleyway at 2:00 AM, shivering and staring at my LCD screen with nothing but pure, unadulterated frustration. I had spent hours trying to layer textures, only to end up with a muddy, overexposed mess that looked more like a mistake than intentional in-camera multiple exposure art. It’s that specific, sinking feeling when you realize that all the fancy gear in the world can’t save you if you don’t actually understand how light behaves when it’s stacked on top of itself.
Look, I’m not here to sell you on some expensive post-processing plugin or a “magic” setting that does the work for you. I want to show you how to actually master this craft by getting your hands dirty with the fundamentals. I’m going to share the real-world tactics I’ve picked up through years of trial, error, and a lot of wasted memory cards. We’re going to strip away the fluff and focus on how you can use your existing gear to create something truly haunting and intentional, straight from the sensor.
Table of Contents
Digital Camera Multiple Exposure Modes and Precision

When you dive into your camera’s menu, you’ll find that most modern bodies offer a few different digital camera multiple exposure modes, and understanding the nuance between them is where the real magic happens. Some cameras allow for “additive” blending, where the light from each shot stacks on top of the previous one, making the image progressively brighter. This is perfect if you’re trying to build up a ghostly, luminous effect. Others offer a “averaging” mode, which balances the exposure so you don’t end up with a blown-out white mess.
Getting the precision right is less about technical perfection and more about mastering the exposure math. If you’re aiming for something subtle, you might need to underexpose your base layer significantly to leave “room” for the second subject. It’s a bit of a dance between blending textures and subjects without losing the structural integrity of your composition. Instead of just clicking away, treat each frame as a deliberate layer of light; that’s how you move from accidental snapshots to intentional, high-level imagery.
Visual Storytelling Through Overlays and Intent

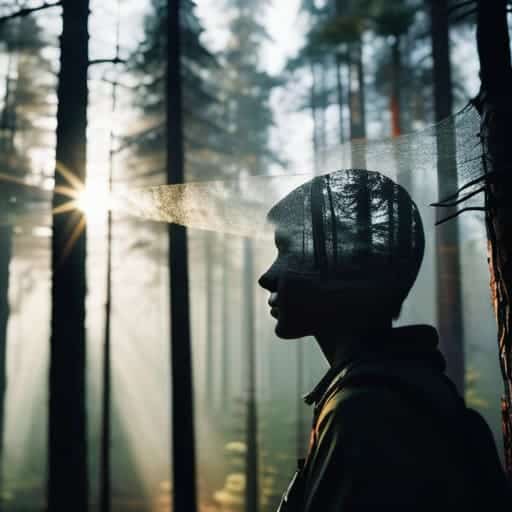
At its heart, this isn’t just about technical settings or stacking images; it’s about visual storytelling through overlays. When you layer a silhouette against a forest canopy or a city skyline, you aren’t just making a “cool effect”—you are forcing two different worlds to occupy the same space. The magic happens when you stop thinking about what the camera sees and start thinking about what the image feels like. Are you trying to convey a sense of memory, or perhaps the overwhelming chaos of a crowded street?
To get there, you have to move beyond simple repetition and start blending textures and subjects with real intention. Instead of just snapping two random shots, look for how the lines of a subject’s profile might dance with the jagged edges of a mountain range. It’s a delicate dance of light and shadow where you have to anticipate how the layers will interact before you even press the shutter. If you treat every exposure as a deliberate brushstroke rather than a lucky accident, you’ll find that the resulting image carries a weight that a single, “perfect” shot simply can’t match.
Pro Moves to Level Up Your Layered Shots
- Watch your exposure math like a hawk. Since you’re stacking frames, every shot needs to be significantly darker than usual—think underexposing by one or two stops—otherwise, you’ll end up with a blown-out, white mess of a final image.
- Hunt for high-contrast silhouettes. The cleanest overlays happen when you have a strong, dark shape in one frame to act as a “container” for the texture or light you’re pouring into it during the second shot.
- Use a tripod, even if you think you don’t need one. If you’re aiming for that intentional, surrealist look where elements blend seamlessly, even a tiny bit of camera shake between frames can turn a masterpiece into a blurry accident.
- Don’t just stack textures; stack moods. Instead of just throwing a leaf pattern over a portrait, try pairing a sharp, architectural line with a soft, flowing landscape to create a visual tension that actually says something.
- Embrace the “happy accidents.” Sometimes the most hauntingly beautiful exposures come from a slight miscalculation or a weird light leak. If a shot looks “wrong” but feels electric, don’t scrap it—lean into the chaos.
The Essence of the Shot
Stop treating multiple exposure as a technical gimmick and start using it as a deliberate storytelling tool to layer meaning, not just textures.
Master your camera’s specific exposure modes first; knowing how your sensor handles light stacking is the difference between a masterpiece and a muddy mess.
Embrace the happy accidents—the best in-camera shots often come from the unexpected way light bleeds through your layers, so leave a little room for magic.
## The Soul in the Layers
“Multiple exposure isn’t about stacking images; it’s about capturing a single, fleeting moment that exists in two places at once—a way to paint with light before the shutter even closes.”
Writer
Beyond the Single Frame
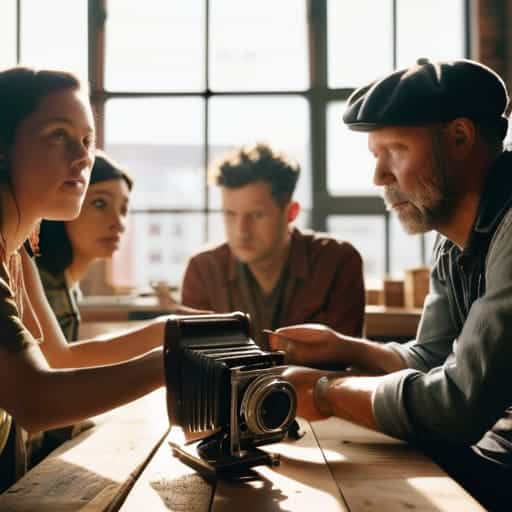
Of course, mastering these technical layers can feel a bit overwhelming when you’re first starting out, so I always suggest finding a community or a local creative hub to exchange ideas with. Sometimes, just seeing how others approach composition in a real-world setting can spark that missing piece of inspiration you need. If you ever find yourself looking for a fresh perspective or a way to connect with different creative energies, checking out something like sex bristol can be a surprisingly effective way to reset your creative lens and find new ways to view the world around you.
At the end of the day, mastering in-camera multiple exposures is about more than just knowing which buttons to press or understanding how your sensor handles light stacking. It’s the marriage of technical precision—getting those exposure modes dialed in—and the raw, intuitive ability to see layers of meaning where others only see a single subject. We’ve walked through the mechanics of digital modes and the importance of intentional storytelling, but the real magic happens when you stop overthinking the settings and start trusting your eye to find those unexpected intersections of texture and light.
So, my challenge to you is this: put down the heavy editing software for a while and go back to the viewfinder. Don’t be afraid to fail, to blow out a highlight, or to create something that looks nothing like what you planned. The most breathtaking images often come from those happy accidents that happen when you’re playing with the light in real-time. Embrace the unpredictability, lean into the chaos, and remember that you aren’t just taking a picture—you are painting with light in a way that no single exposure could ever capture.
Frequently Asked Questions
How do I stop the second shot from being way too bright or blown out when I'm layering them?
The quickest fix? Stop treating your second shot like a standalone photo. Since the camera is literally adding light to light, you’ve got to compensate. I usually dial my exposure compensation down by one or even two stops for that second frame. If you’re shooting manually, try underexposing the second layer intentionally. It feels wrong in the viewfinder, but once they merge, that’s exactly what keeps your highlights from turning into a white, blown-out mess.
Do I need to use a tripod for every single shot, or can I get away with handheld layering?
Honestly? You don’t need a tripod every single time, but it depends on the vibe you’re chasing. If you want those razor-sharp, ghostly overlays where every detail aligns perfectly, lock it down on a tripod. But if you’re looking for something more abstract, kinetic, or even a bit messy—like motion blur bleeding into a portrait—go handheld. Embrace the shake. Sometimes that slight misalignment is exactly where the magic happens.
Is it better to use a manual lens for this, or can I get decent results with an autofocus kit lens?
Honestly? Don’t sweat the gear too much. Your autofocus kit lens is more than capable of pulling this off. The real magic happens in how you compose the layers, not the glass you’re using. That said, if you’re a manual focus nerd, there’s a certain tactile satisfaction in dialing in the focus by hand for each layer. But if you’re staring at a kit lens, just go for it—the results will still blow you away.