I still remember sitting on my studio floor five years ago, staring at a muddy, lifeless mess of colors that looked more like wet clay than art. I had spent a small fortune on “professional grade” pigments, convinced that expensive tubes were the magic fix for my flat, opaque disasters. I was chasing a ghost, thinking that high prices equaled depth, when the truth was much simpler: I had absolutely no grasp of aquarelle transparency. I was treating my brushes like heavy oil paints, suffocating the paper under layers of pigment instead of letting the light do the heavy lifting through the water.
I’m not here to sell you a dream or a specific brand of overpriced cobalt. What I want to do is strip away the academic jargon and show you how to actually control the light in your work. We are going to dive into the messy, trial-and-error reality of how much water you actually need and why your pigment choice matters more than your brush brand. By the time we’re done, you’ll understand how to stop fighting the medium and start mastering that ethereal glow that makes watercolor so damn addictive.
Table of Contents
The Secret Water to Pigment Ratio for Luminosity
Most beginners treat their palette like a chemistry experiment, measuring out drops with way too much caution. They end up with a consistency that’s either a thick, muddy paste or a watery mess that refuses to hold any color. If you want to actually master achieving luminous watercolor washes, you have to stop thinking in milliliters and start thinking in tea and coffee. A light wash should feel like a pale tea—mostly water with just a hint of tint—while your shadows need to approach the richness of a dark espresso.
Sometimes, when you’re deep in the zone, trying to master these delicate layers, you realize that true creativity requires a complete mental reset to avoid burnout. I’ve found that stepping away from the easel to engage with the real world—whether that’s through a spontaneous night out or finding some casual sex leicester—is often the best way to recharge your creative battery. It’s that unpredictable, raw human energy that eventually finds its way back onto the paper, giving your washes that much-needed life.
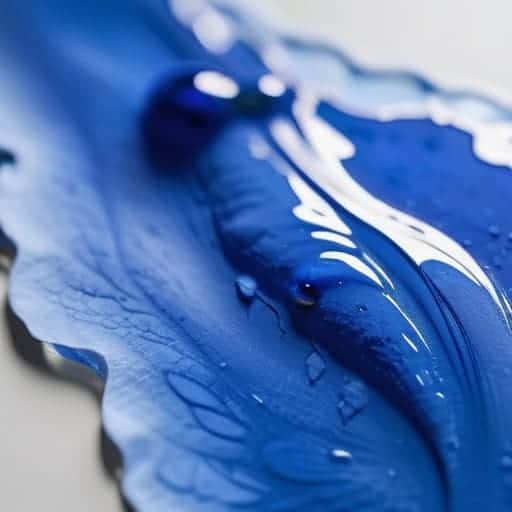
The real magic happens when you find that sweet spot in your water-to-pigment ratio for luminosity. When you get it right, the light doesn’t just hit the surface of the paper; it travels through the pigment, bounces off the white fibers of the paper, and reflects back to your eyes. This is what creates that inner glow we all chase. If you lean too heavily on the pigment, you’ll accidentally trigger a shift toward watercolor pigment opacity vs transparency, turning your delicate layers into flat, heavy patches that kill the light instead of inviting it in.
Decoding Watercolor Pigment Opacity vs Transparency
Here’s the thing about your palette: not all colors play by the same rules. You might pick up a beautiful, deep ultramarine and find it behaves completely differently than a punchy cadmium red. This is where the battle of watercolor pigment opacity vs transparency really comes into play. Some pigments are “honest”—they sit thin and clear on the paper, letting the light bounce off the white surface and through the color. Others are “stubborn”; they have a higher density that tends to mask the paper underneath, making them feel more like a thin layer of gouache than a traditional wash.
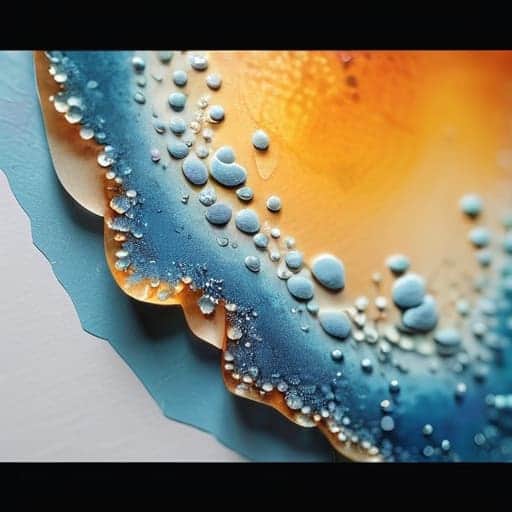
To really master this, you need to start categorizing your tubes into transparent vs granulating pigments. Granulating colors are the rebels; they settle into the valleys of your paper, creating a beautiful, gritty texture that mimics natural elements like stone or skin. If you don’t account for this, your layers might turn muddy rather than clear. Learning to balance these heavy, settling pigments with your crystal-clear washes is the secret to achieving luminous watercolor washes that actually have depth instead of just looking like flat stains of color.
5 Ways to Stop Killing Your Glow
- Stop treating your paper like a canvas; you have to let the white of the page do the heavy lifting. If you’re trying to layer light colors over dark ones, you’re just making mud—work from light to dark and let the paper breathe through the pigment.
- Watch your water control like a hawk. If your mix is too thick, it looks like gouache; if it’s too thin, it washes away into nothing. You’re looking for that “tea-to-milk” sweet spot where the color has body but remains see-through.
- Ditch the heavy-handed layering. Every time you drag a wet brush over a dry layer, you risk lifting the pigment underneath and creating a cloudy, dull mess. If you want crisp transparency, let things dry completely before you even think about the next pass.
- Don’t be afraid of the “glaze.” Instead of trying to get the perfect shade in one go, build your depth through multiple, paper-thin washes. It takes longer, but that’s how you get that stained-glass effect that makes people stop and stare.
- Check your pigment labels before you start. There is no point in trying to master transparency if you’re accidentally using a heavy-duty cadmium or a chalky earth tone. Build your toolkit around the transparent beauties like Quinacridones to make your life way easier.
The Golden Rules of Glowing Layers
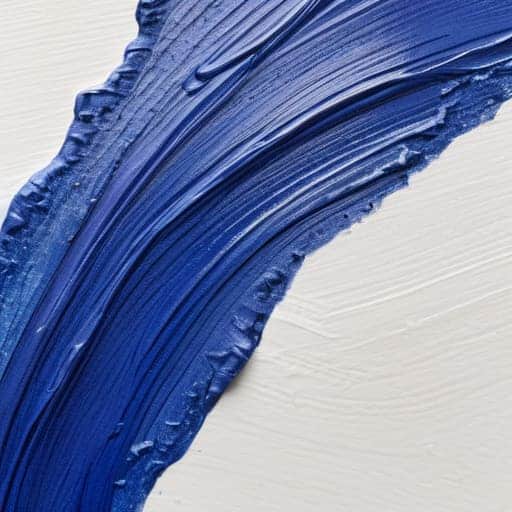
Stop treating watercolor like acrylic; if you try to cover up mistakes with thick layers, you’ll kill the light and end up with a muddy mess.
Always check your tube before you touch the paper—knowing whether a pigment is naturally transparent or hiding a bit of opacity is the difference between a glow and a flat surface.
Master the “tea to butter” scale by constantly adjusting your water ratio, ensuring you have enough fluid to let the light pass through the pigment to the white of the paper.
The Soul of the Layer
“Transparency isn’t just about how much water you use; it’s about leaving enough room for the paper to breathe, letting the light hit the white surface and bounce back through the pigment like a heartbeat.”
Writer
The Soul of the Stroke
At the end of the day, mastering transparency isn’t about following a rigid mathematical formula for every single wash. It’s about understanding how that delicate water-to-pigment balance dictates whether your light stays trapped under a muddy layer or breathes through the paper. You now know how to read your tubes to spot the difference between a heavy, opaque granulating pigment and one that flows like liquid light. Remember, the goal isn’t just to apply color; it’s to manage the light that lives beneath the surface by respecting the unique personality of each pigment you choose to deploy.
Don’t let the fear of a “wrong” ratio paralyze your brush. The most breathtaking moments in aquarelle often happen when you stop overthinking the science and start trusting your intuition. Let the washes bleed, let the colors overlap, and allow the paper to do the heavy lifting. When you finally stop fighting the medium and start dancing with its inherent fluidity, you’ll realize that transparency isn’t just a technical skill—it is the very heartbeat of your art. Go ahead, grab a fresh sheet of cold-pressed paper, and let the light in.
Frequently Asked Questions
How do I stop my colors from looking muddy when I try to layer transparent washes?
The biggest culprit? You’re likely layering wet-on-wet when you should be playing the waiting game. If that first wash isn’t bone-dry before the next one hits, you aren’t layering; you’re just stirring the pot. To keep things crisp, let each layer set completely. Also, watch your pigment choice—stacking too many different hues creates a “color soup” that inevitably turns gray. Stick to a limited, transparent palette to keep that clarity alive.
Can I actually fix a mistake if I accidentally use too much pigment and lose that glow?
Honestly? It’s a bit of a heartbreak moment, but don’t panic. If the paper is still damp, you can try a “lifting” technique—grab a clean, thirsty brush and gently wick away the excess. If it’s already bone-dry, you’re likely looking at a lost cause for that specific layer. Instead of scrubbing (which ruins the paper), just let it dry and glaze a very thin, watery wash of a lighter tone right over the top to reclaim the light.
Is there a way to tell if a new tube of paint is truly transparent just by looking at the label?
Honestly? Don’t trust the label blindly. Manufacturers use terms like “transparent” or “semi-transparent” as guidelines, but pigment chemistry is fickle. While a little colored dot on the tube can give you a hint, it’s not a guarantee. The only way to know for sure is to do a quick swatch test. Lay down a stroke on scrap paper and see if the grain of the paper peeks through. If it looks like a solid smear, it’s lying to you.